


A familiar dungeon. Serenity’s rules.
Chambers of Xeric is a fixed expedition through four connected floors. Enter alone or form a party of up to eight. Everyone follows the same room order, fights the same sequence of bosses and finishes at the Great Olm’s ancient chest.
Crabs, Thieving and Tightrope are freely traversable. Ice demon needs no thawing. Guardians need no pickaxe. Vespula has no grub-management step. Olm is one pair of hands followed by the head, on the same wall, with no player teleports or pushes.
Bosses scale from the party that starts the raid, including party size and relevant combat stats. Adding more players is not simply a way to fight a solo-health boss. There is no separate Challenge Mode selection in the current raid.
Deaths are safe: your equipment, coins, raid supplies and Hardcore status are protected. Death still reduces your personal raid points, so surviving matters for your chest. The entrance lobby is protected on World 2 as well.
From Edgeville to the entrance
Travel to Edgeville
Open ::tp, choose Cities → Edgeville, then walk northeast of the bank toward the Wilderness border. The Chambers guide stands on safe ground south of the Wilderness; you do not need to cross the border.
Speak to the Chambers guide
Choose “I’d like to travel to the Chambers.” Read his explanation, then confirm “Yes, take me to the entrance.” Simply talking to him does not immediately teleport you.
Finish banking in the lobby
Use the original dragon-headed bank chest. Equip your combat switches, collect food, restores, runes and ammunition, and leave space for any optional tools. The explorer does not act as a bank. Ordinary bank access closes once your expedition starts.
Create or join your party
Use the lobby guide’s Party option or ::raid. To go solo, make a party and mark yourself Ready. For a group, the leader uses Invite player and the invited player accepts the invitation. Everyone must be in the lobby and ready before the leader can start.
Start together
The leader presses Start raid. Your party enters its own connected dungeon. Ready states reset when the lobby membership changes, so check that everyone is ready again after a new player joins or someone is removed.
Equipment & supplies
There is no special Bossing-level entry requirement. Your equipment and spell requirements still apply. The levels below are recommendations for a smoother first run, not extra restrictions imposed by the guide.
Comfortable starting point
- Roughly 80–90+ in your chosen combat skills and enough Hitpoints to survive consecutive hits.
- At least 43 Prayer for all three standard protection prayers; 70+ gives more room for a long run.
- A melee weapon, a ranged weapon and a magic setup you can actually use.
- A modern fire spell with sufficient runes for Ice demon.
A practical inventory
- Good healing food and Prayer or super restore supplies.
- Poison protection for shamans, Vespula and Olm hazards.
- Appropriate arrows or bolts, plus your spell runes.
- An axe if you want to cut the Muttadiles’ meat tree.
- Optional gathering tools if you intend to prepare extra supplies inside.
| Role | What it solves | What to look for |
|---|---|---|
| Melee | Tekton, Guardians and Olm’s left claw | A reliable weapon you meet the requirements for; a crush option helps with Tekton. |
| Ranged | Mobile fights, mystics and Olm’s head | A bow or crossbow with the correct ammunition and enough supply for the entire run. |
| Magic | Olm’s right claw and combat switches | A usable spell, the required runes, and gear that supports your accuracy. |
| Fire magic | Ice demon’s strong elemental weakness | A modern fire spell. Non-fire attacks receive a large damage reduction. |
| Special attack | Optional extra damage or defence reduction | Use an existing weapon you know; no particular special-attack weapon is required to enter. |
For your first clear, favour fewer well-practised switches over a full inventory of upgrades. A weapon is not useful if you forgot its ammunition or cannot cast the spell that goes with it. Confirm your choices in the item archive and skill guides.
Solo or group: how should you prepare?
Solo: bring all three styles yourself, practise changing protection prayers, and keep spare health for Vasa’s shared blast. You cannot assume another player will cover a missing style.
Group: agree on Vanguard targets, who will call Vasa’s crystal, and who will use magic and melee on Olm’s hands. Everyone should bring their own restores, ammunition and food. Share spare raid supplies through the shared storage, not by relying on the ordinary bank mid-run.
One connected expedition
Walk the original corridors, use the original room passages and descend through the floor exits. Each combat room must be cleared before you can continue beyond it. The layout is the same each run, so you can learn it once and become more efficient.
03Lower chambers
- Arrival
- Guardians
- Vasa
- Scavengers
- Mystics
- Muttadiles
- Preparation
- Next floor
04Olm’s lair
Know what waits in each chamber
Follow this order from the first boss to the ancient chest. These tactics describe Serenity’s current encounters.

Tekton
The expedition begins at the anvil. Tekton fights in melee, becomes more dangerous below half health, and periodically retreats to repair himself.
Establish a melee rhythm
Equip your strongest suitable melee weapon, use your melee protection prayer and stay aware of your health. Ranged attacks cannot damage Tekton here; magic damage is heavily reduced. A crush weapon is a sensible starting choice against his defences.
Follow the anvil warning
When the message announces his return to the anvil, stop chasing damage. Tekton is immune while walking back and hammering. He heals during the anvil phase, so use this pause to restore Prayer and prepare your next attack.
Move away from the sparks
Sparks target the squares where players were standing, then strike after a short delay. Step away from a marked square rather than standing still and eating through repeated hits. Spread the party out so everyone has room to move.
Resume when he leaves the anvil
Wait for the hammering sequence to end and attack again. Keep enough food for his stronger attacks below half health; do not treat the final stretch as a safe damage race.
Do not waste supplies attacking him during the anvil phase.
Field notes for Tekton
- A player who only brings a bow will be unable to contribute to this encounter.
- Defence-reducing specials can be useful, but they are optional equipment choices, not an entry requirement.

Ice demon
This version is ready to fight immediately. There is no kindling collection, brazier puzzle or thawing requirement.
Switch to fire magic
Bring a usable modern fire spell and its runes. Fire spells receive a 2.5× damage modifier here, while other damage is reduced to roughly one third. The correct spell family matters more than simply equipping a magic weapon.
Keep a protection prayer active
The demon uses ranged and magic attacks. Its attack choice follows an active missile or magic protection prayer, so keeping the appropriate protection active helps. Protection is damage reduction, not permission to ignore the floor attack.
Dodge the targeted area
The projectile targets your previous location. Its blast covers a 3×3 square, including diagonal neighbours. Move at least two tiles from the aimed square before it lands; a single diagonal step is still inside that area.
Keep your party separated
Avoid grouping everyone on one square. Use a fire spell, move out of the next impact area and settle back into your casting rhythm. Once the demon dies, continue along the connected route.
Ordinary melee, bows and non-fire magic are much slower choices here.
Field notes for Ice demon
- You can pass the empty puzzle rooms without paying an NPC or solving their original puzzles.

Lizardman shamans
Two shamans share the chamber. Their jumps, poison and exploding summoned creatures make movement more important than standing still for uninterrupted damage.
Choose a target and keep space
Ranged is a practical approach because it lets you keep distance from jumps and summons. Focus one shaman at a time unless your group has agreed to divide targets. Bring poison protection for the encounter.
React to the jump
A shaman can leap toward a player’s position. Move away from the area you occupied when the jump began; it lands with an area hit. Attacks during the jump window cannot damage it.
Run from the summoned creatures
The smaller summoned creatures follow their target and explode. They are not useful targets to fight: damage to them is blocked. Create space and let them detonate away from your party.
Finish both shamans
Do not run on when only one is dead. Restore your health and Prayer before taking the exit, then use the resource room if you need to prepare more supplies.
Standing beside the rest of the party can turn one jump or explosion into several avoidable hits.
Field notes for Lizardman shamans
- Missile protection helps with their ordinary ranged attacks, but poison, jumps and explosions still need separate attention.
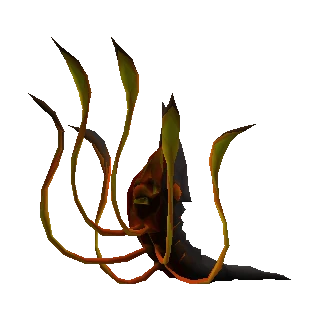
Vanguards
Three Vanguards use different combat styles. If their remaining health becomes too uneven, all three heal back to full.
Assign targets before dealing heavy damage
Use magic against the melee Vanguard, melee against the ranged Vanguard, and ranged against the magic Vanguard where your equipment allows. In a group, nominate someone to call target switches.
Compare health percentages
Their reset checks relative health, not the damage number shown by your last hit. With 1–4 players, a gap above 40 percentage points triggers a full heal; with 5–8 players, the allowed gap is one third. Keep their bars close well before reaching those limits.
Switch before a big lead develops
In a solo, rotate targets and keep your three weapon styles ready. In a party, pause damage on the lowest-health Vanguard while the others catch up. Strong special attacks are risky when the bars are already uneven.
Bring them down together
Once all three are low, finish them in a controlled sequence. If the restoration message appears, stop repeating the same damage split: regroup, check bars and distribute attacks more evenly.
A fast kill on one target is not progress if the other two are still almost full.
Field notes for Vanguards
- One protection prayer cannot cover all three styles at once. Position and food still matter.
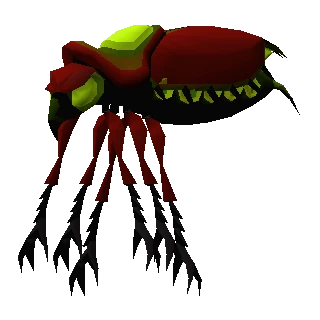
Vespula & the abyssal portal
The abyssal portal is the room’s completion target. Vespula is its defender; there are no lux grubs to feed or protect in Serenity’s boss run.
Identify the portal in its original frame
The attack target belongs to the portal inside the scenery frame. Use the target’s name to confirm your click rather than attacking a decorative part of the room. Killing the portal is what opens the route.
Use ranged or magic against Vespula
Her flying form is out of reach of ordinary melee weapons. Damaging her toward low health makes her land, giving you an opening against the portal. She is deliberately kept alive for this transition.
Use the landing window
When the landing message appears, concentrate damage on the portal. Vespula cannot be damaged while landed. The window lasts about twenty seconds, so have your equipment and supplies ready before triggering it.
Respect a direct portal attack
Attacking the portal while Vespula is airborne can enrage her and bring her toward it. Keep space from her melee attacks and watch your health. Repeat the landing-and-portal approach if you need a safer rhythm.
Trying to kill Vespula instead of the portal will not finish the encounter.
Field notes for Vespula & the abyssal portal
- Poison protection is useful against her flying attacks.
- There is no grub-feeding step in this server’s current raid.

Guardians
Two stone Guardians block the way. They remain anchored and only strike players who are adjacent to them.
Equip your normal combat weapon
There is no pickaxe requirement and no Mining-level requirement to attack these Guardians. Keep your usual melee setup rather than sacrificing a weapon slot to an unnecessary pickaxe.
Fight at the edge of their reach
A Guardian’s melee hit requires adjacency to its footprint. Keep your overhead protection active when moving into melee range. Avoid standing beside both at once if you can fight one at a time.
Finish the pair
Focus damage, maintain your health and kill both Guardians before moving on. Ranged and magic are not blocked by a special pickaxe-only rule, but your ordinary melee setup is a straightforward option.
Do not follow an external guide that tells you a pickaxe is mandatory here.
Field notes for Guardians
- Boss health scales with the starting party, so do not assume a larger group faces the same health total as a solo.

Vasa Nistirio
Vasa alternates between attacking, drawing energy from a crystal and preparing a shared energy blast.
Attack Vasa between channels
Ranged works well for maintaining damage while watching the room. Keep missile protection active for his regular ranged attacks and save enough health for attacks that are not prevented by an overhead prayer.
Destroy the healing crystal immediately
When the glowing-crystal message appears, Vasa becomes immune and heals. Switch to the attackable crystal instead of continuing to hit Vasa. The crystal’s death interrupts his healing; another crystal cannot be summoned immediately afterward.
Share the energy blast
Vasa can move a selected player toward the centre and briefly stun them. When the energy warning appears, nearby party members should group around that landing area to share the blast. In a solo, keep comfortably above 60 Hitpoints before this special.
Return to damage after the danger passes
Once the crystal or blast sequence ends, spread back into a sensible formation and resume attacking Vasa. Call the crystal switch early in a group.
Ignoring the crystal prolongs the fight; leaving one player alone for the shared blast makes it much more dangerous.
Field notes for Vasa Nistirio
- Vasa’s repositioning is part of this encounter. Olm’s player teleports and pushes are disabled separately.

Skeletal mystics
A group of aggressive mystics attacks as you enter. The number increases with the starting party size.
Prepare your magic protection before entry
The mystics cast magic at range. Enter with a ranged weapon ready and keep enough Prayer to maintain protection while you work through the group.
Focus one mystic at a time
Coordinate target calls so enemies die promptly rather than leaving several damaged mystics alive. In larger teams, do not assume the room contains the same number of enemies as a solo.
Avoid unnecessary melee contact
A nearby mystic can use melee when its target is protecting from magic. Keep your distance where possible instead of standing on the target and relying on a single overhead prayer.
Magic protection does not make standing directly beside a mystic harmless.
Field notes for Skeletal mystics
- You do not need to wake each mystic with a separate attack. Treat the room as active when your party arrives.

Muttadiles
The smaller Muttadile fights first. The larger one stays hidden and inactive until the smaller one dies and its emergence animation finishes.
Fight the smaller Muttadile first
Maintain distance and use missile protection when fighting from range. Close proximity invites melee attacks, so watch where your target is moving instead of only watching its health bar.
Decide what to do about the meat tree
A wounded Muttadile can seek the meat tree and recover a large amount of health. An axe lets you cut the tree down and prevent further feeding. This is an optional combat preparation task, not an entry requirement or an empty puzzle-room objective.
Prepare for the larger Muttadile
Top up your health and Prayer as the smaller one dies. Wait for the larger creature to emerge, then switch your attacks to it. It can use ranged or magic from a distance and dangerous melee when you are close.
Keep moving during marked attacks
The larger Muttadile can mark nearby players’ squares for delayed area hits. Move from a marked square and avoid bunching up. If either creature starts heading for the tree, call it out rather than letting the heal pass unnoticed.
Do not stand beside the large Muttadile simply because you are protecting from missiles.
Field notes for Muttadiles
- Tree cutting needs an axe. Higher Woodcutting improves your effectiveness, but the tree can be damaged without a special raid-only axe.
Great Olm
The final battle is one encounter: defeat both hands once, then the head on the same wall. There are no repeated hand phases, side swaps or forced player teleports or pushes.
Prepare in the staging area
Use the rope to reach the final floor, restore your health and Prayer, and equip a hand-appropriate weapon before passing into the arena. The staging area is outside the fight: Olm cannot attack you until you enter the arena.
Destroy the two hands
Use magic on the right claw and melee on the left claw. Other styles deal reduced damage to those targets. Either kill order works, and the head cannot be damaged properly until both hands are dead. In a group, assign the magic and melee roles before crossing in.
Respect the clenched melee hand
The left claw can clench after taking enough damage while the other hand is still alive. A clenched hand blocks damage: switch targets or use the pause to recover rather than spending special energy into an invulnerable target.
Switch to ranged for the head
When both hands are defeated, switch to your bow or crossbow. Ranged deals full damage to the head; melee and magic are reduced. The hands do not return for another full fight, and Olm stays on the same wall.
Handle spheres and overhead prayers
Red means melee, green means missiles, and purple means magic. An active protection prayer is turned off when a sphere launches and costs half your remaining Prayer points. Quickly activate the matching protection before impact. Keep restore supplies available and check that your overhead is still on afterward.
Move off hazards, then resume attacking
Step away from crystal seedlings, falling-crystal markers, acid and flame marks. Keep at least two tiles away from the aimed falling-crystal square if possible: adjacent squares can also take splash damage. Move out of a sweeping lightning line; a hit can stun you and switch off overhead prayers.
Stand in a blue pool for life siphon
During the head phase, the blue-pool warning gives you time to reach one of the two marked squares. Stand on an actual pool square, not just beside it. Unprotected players take damage and heal Olm for several times the damage dealt.
Claim the chest and leave by the steps
After the head dies, wait for the crystal and chest reveal. Open the ancient chest, inspect your personal rewards and use Take all, individual item clicks or Bank all. The original steps then return you to the raid lobby.
The most common late-fight mistake is continuing to attack the head instead of standing in a blue pool during life siphon.
Field notes for Great Olm
- Do not use an OSRS multi-phase Olm guide as a phase checklist for Serenity.
- Player movement from Olm attacks is disabled, but you still need to move voluntarily to avoid the marked floor attacks.
- If you are learning in a team, call spheres, lightning and the blue-pool warning out loud. Clear communication matters more than forcing extra attacks during a dangerous mechanic.
No encounters match that search. Try a boss name or clear the search to show the full guide.
Preparation between encounters
You can bring supplies from outside and use the resource rooms to make more. Preparing inside is optional; it does not turn the empty puzzle rooms back into mandatory puzzles. Your character’s gathering and production skills still matter.
Food & gathering
Fish at a suitable fishing spot with a fishing rod and cave worms as bait. Scavengers can provide tools, bait, planks, seeds and potion secondaries. Bat hunting uses a butterfly net. Cook gathered raw food at a valid cooking site before eating it.
Food tiers use level bands of 1, 15, 30, 45, 60, 75 and 90. Your own gathering level determines the tier you catch, while Cooking still controls what you can cook. Cooked raid food heals 5, 8, 11, 14, 17, 20 or 23 Hitpoints across those tiers. Higher-tier resources are worth gathering when your levels allow it.
Shared & private storage
Use the raid storage chest’s Shared or Private option. Shared supplies can help the party; Private keeps your stored supplies separate. Deposit supplies, change pages if necessary and click a stored item to withdraw one.
Raid storage is for expedition supplies and supported tools. It is not a second permanent bank for outside equipment. Empty it before leaving: the storage belongs to that temporary expedition.
Grow the herbs you need
Take a rake, spade and seed dibber from the old tools if needed. Rake a resource-room patch, plant a supported seed and allow it to grow. Golpar requires 27 Farming, buchu 39, and noxifer 55. The patch takes about 30 seconds to grow; its harvest supply scales with the party.
Clean golpar at 47 Herblore, buchu leaf at 52 and noxifer at 60. Pick empty gourd vials from the gourd tree, then fill them at the water geyser. Filling replaces empty vials in place, so it works even when the rest of your inventory is full.
| Family | Ingredients | Herblore |
|---|---|---|
| Elder / twisted / kodai | Golpar + stinkhorn mushroom / cicely / endarkened juice | 47 / 59 / 70 |
| Xeric’s aid | Buchu leaf + endarkened juice | 52 / 65 / 78 |
| Revitalisation | Buchu leaf + stinkhorn mushroom | 52 / 65 / 78 |
| Prayer enhance | Buchu leaf + cicely | 52 / 65 / 78 |
| Antipoison | Noxifer + cicely | 60 / 75 / 90 |
| Overload | Noxifer + full elder, twisted and kodai potions of the required tier or higher | 60 / 75 / 90 |
Except for overloads, combine the clean herb and secondary with a water-filled gourd. For an overload, use noxifer with full four-dose elder, twisted and kodai potions of the required tier or higher. Keep the necessary ingredients together before opening the mixing options.
What do the raid potions actually do?
- Elder: boosts Attack, Strength and Defence. Twisted: boosts Ranged and Defence. Kodai: boosts Magic and Defence. Higher tiers give stronger boosts.
- Xeric’s aid: heals and boosts Defence, but drains Attack, Strength, Ranged and Magic. Plan how you will restore those stats before continuing your damage rotation.
- Revitalisation: restores drained skills and Prayer. It is useful after using Xeric’s aid.
- Prayer enhance: restores Prayer gradually over time. It does not replace a timely restore when you are about to run out during a special attack.
- Antipoison: cures poison and supplies a tier-dependent period of poison immunity.
- Overload: periodically reapplies combat boosts for about five minutes. Drinking requires more than 50 current Hitpoints and causes five non-lethal self-damage hits of up to 10. Prepare safely before combat; it does not make you immune to a boss attack landing at the same time. A second dose is blocked while the effect is active.
Earn your place among the treasures
Defeat Olm’s head and wait for the chest to be uncovered. Rewards are personal: each player sees their own chest contents and light. You must have damaged a raid enemy to earn a personal roll.
White
Ordinary rewards, without a unique or a colour-kit-only result.
Purple
Your chest contains a main unique reward.
Green
A twisted ancestral colour kit, without a main unique in that chest.
Click an item to take it individually, choose Take all for your inventory, or Bank all for direct bank delivery. Bank all converts eligible noted resources to their normal bank form. If the destination lacks space, make room and try again; do not assume the first attempt delivered everything.
The main unique table
 Twisted buckler4 / 29 unique weight
 Dragon hunter crossbow4 / 29 unique weight
 Dinh's bulwark3 / 29 unique weight
 Ancestral hat3 / 29 unique weight
 Ancestral robe top3 / 29 unique weight
 Ancestral robe bottom3 / 29 unique weight
 Dragon claws3 / 29 unique weight
 Kodai insignia2 / 29 unique weight
 Elder maul2 / 29 unique weight
 Twisted bow2 / 29 unique weight
The weights above apply after a unique is rolled. They are not per-raid drop rates. A twisted bow’s 2/29 weight, for example, is its share of a successful main-unique selection.
How points and unique rolls work
Your contribution is based on damage recorded by the raid. Remaining contribution is multiplied by four for displayed personal points, capped at 131,071. A death keeps 60% of the points you have earned so far; it does not remove your items.
The party’s combined points feed the unique rolls. A successful unique is assigned by personal contribution, and each player can receive at most one main unique in that completion. Joining a larger team does not give every player a separate roll at the full team’s chance.
For a solo with positive points, the main-unique chance is personal points divided by 867,500, before the weighted item choice. As examples, 10,000 points is about 1.15%, 50,000 is about 5.76%, and 100,000 is about 11.53%. These are examples of the formula, not promised point totals for a run.
More to discover


- Dark relic: an additional reward with a 1/10 roll for eligible personal chests.
- Ancient tablet: a 1/10 additional roll, suppressed if you already have the route unlocked or already hold a tablet in your inventory or bank. Read it to unlock ::raidlobby.
- Twisted ancestral colour kit: an additional 1/200 roll. Use it with a normal ancestral piece to make the matching twisted variant.
- Kodai wand: combine a Kodai insignia with a master wand. The completed wand is a collection-log entry; it is not a separate direct main-table drop.
- Ordinary resources: a player without a main unique receives two resource rolls. Amounts scale with personal points, with non-stackable resources delivered as notes.
The in-game and website collection includes the supported equipment, extras, crafted wand, twisted ancestral variants and milestone capes. Prayer scrolls, Olmlet and metamorphic dust are excluded from the raid’s drops and collection. Raid uniques come from the ancient chest; Bossing’s separate level-85 boss-drop system is not an entry requirement.
The Xeric cape milestones
Serenity counts completed runs of this fixed raid toward the five cape milestones. You do not need a separate Challenge Mode clear. The corresponding cape is included at its milestone completion and checks that completion requirement when equipped.
 100completed runsXeric's guard
 500completed runsXeric's warrior
 1,000completed runsXeric's sentinel
 1,500completed runsXeric's general
 2,000completed runsXeric's champion
If an earned cape is missing, ask the Chambers guide “Can I claim my Xeric capes?” He checks your milestones and existing capes, including your equipment, inventory, bank and pending rewards, before offering replacements.
Safe deaths, disconnects & leaving
| Situation | What happens on Serenity |
|---|---|
| You die inside the raid | Your gear, coins, supplies and Hardcore status remain protected. You return to the arrival area of your current floor. Personal points earned so far are reduced by 40%. |
| You log out or disconnect | You leave that party session. Your next login places you in the entrance lobby, rather than in an unloaded private map. Do not treat logout as a way to save your place in a run. |
| The last player leaves | The private expedition and its storage are temporary. Do not leave useful supplies in it expecting a permanent bank. |
| You finish and use the steps | The original steps return you to the raid lobby. They cannot be used to bypass the unfinished final fight. |
| You have unclaimed chest rewards | The saved receipt remains available after leaving or reconnecting. Use ::raid rewards to reopen it. Clear the previous chest before attempting another reward claim. |
| You choose ::raid leave | You leave the party and return to Edgeville. Raid-only supplies expire on exit; keep ordinary equipment and claimed rewards. |
The entrance lobby is a protected area on both worlds. On World 2, that protection belongs to the lobby and the raid activity; the rest of the world still follows its normal PvP rules.
Questions before your next run
Do I need a team, 99s or a Bossing level?
No team is required: you can start solo. There is no special Bossing-level raid-entry gate. You still need equipment, spells and supplies appropriate for the whole route. The recommended levels above are practical guidance, not a promise of an easy clear.
Can I bank halfway through?
The normal bank chest is for preparation in the lobby and closes when your expedition begins. Resource rooms and the raid’s shared/private supply storage help you prepare inside. Bank all on the final reward interface is a separate direct-loot delivery option.
Why will the next passage not let me through?
A mandatory combat target is still alive. Check both shamans, all three Vanguards, both Guardians, every mystic and the current Muttadile. Vespula’s room clears when the portal dies, not when her health becomes low. Vasa’s active crystal must also be dealt with.
Why am I hitting zeroes?
Check the encounter before changing your gear at random: Tekton is immune at the anvil and to ranged attacks; Vasa is immune during crystal healing; Olm’s head is protected before the hands die; a clenched left claw blocks damage; shamans cannot be hit during their jump. Ordinary accuracy can also produce zeroes.
Why did I not receive a personal roll?
You must contribute damage to a raid enemy. Clear any earlier unclaimed chest first: a new completion cannot overwrite a saved receipt. Points and weighted rolls determine the rewards, so completing a raid never guarantees a main unique.
Which music unlocks here?
Upper Depths unlocks in the lobby and upper chambers; Lower Depths plays on the deeper route; Fire in the Deep unlocks on Olm’s floor. They use the normal music list and saved unlocks.

Your first clear starts with good preparation.
Bank your supplies. Gather your party. Meet the explorer in Edgeville.